Are you trying to replace your Anlin patio door rollers but have no idea where to start? Look no further! Learn how to do it like a pro in our quick and easy tutorial. Get ready for an easy, stress-free replacement and put your DIY skills to the test. Become the go-to handyman for all your family and friends with this vlog!
We’re all about helping homeowners! We often get questions about how to replace patio door rollers and because of this, we couldn’t have picked a more ideal topic for this vlog.
To begin, gather all your tools. You will need a Philips screwdriver, a flat head screwdriver, a peg of some sort, a pair of gloves, and a drop cloth.
After you’ve gathered your tools, set up your work area. In other words, lay down your drop cloth.
Next, remove the door. Do this by lifting it out of place. Once the door has been removed from the frame, lay it on its side so you can access the rollers.
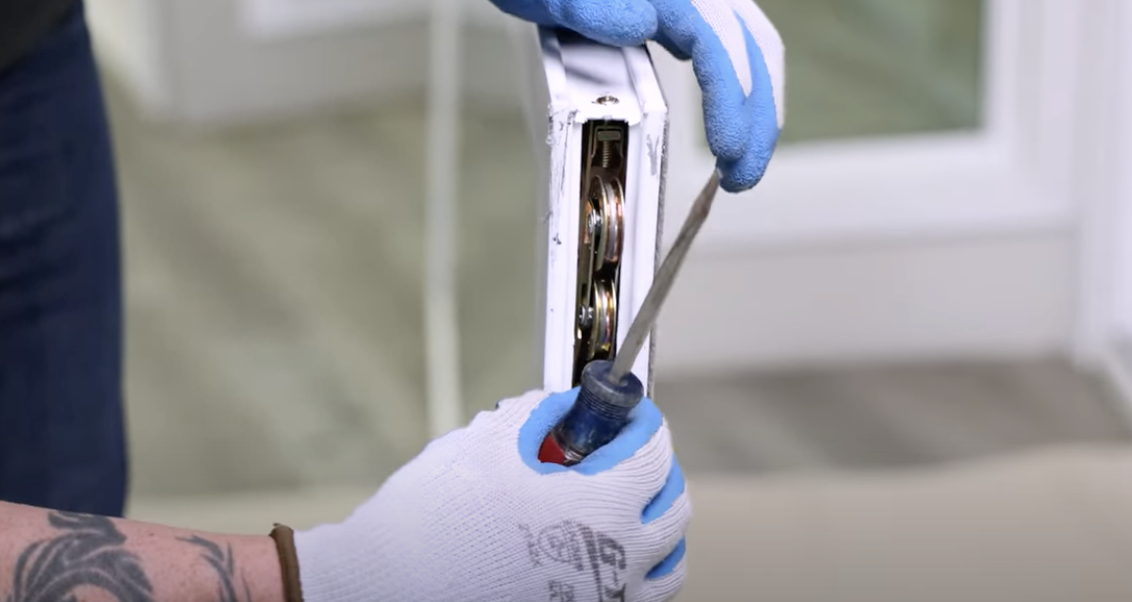
Notice the two screws by the rollers. One is an adjustment screw, and the other is used to hold the rollers in place. Remove the screws and carefully use your flat head screwdriver to pry the roller out.
Once you have done so, insert your new roller. Ensure the screw holes line up with the frame. Give it a few pushes to secure the roller in place. Tip: Hold the roller evenly as you screw it in to ensure it will glide appropriately on the track.
If you want to take your DIY skills further, take the time to clean out (or switch out) your existing track. All you need is your handy-dandy flat head screwdriver. Gently pry the track until you can remove it. After you have successfully removed it, take a brush and vacuum to your frame to remove any debris. Next, put your track back in, aligning one side with another. Start at one point and snap it into place completely.
To finish the job, reinstall your door. Keep the door close to you for control. Insert the door by aligning the top and pushing it inwards until the bottom pops into the frame. Take the time to check your reveal. If your door isn’t rolling evenly, don’t worry. Take your Phillips head screwdriver to the adjustment screws mentioned earlier (bottom corner) to make any necessary alignments. Turning the screw clockwise will elevate the door, and vice versa. Use the peg to keep the door in place while you make adjustments. Measure the height on each side of your door to ensure it’s even.
There you have it, our quick and easy tutorial! Watch the video below to get the full scoop.
Stay tuned for more valuable patio door tips from American Window Concepts, window experts based in Ventura County & Orange County.
